WordPress Caching Strategy: Using Memcached and OPcache Together
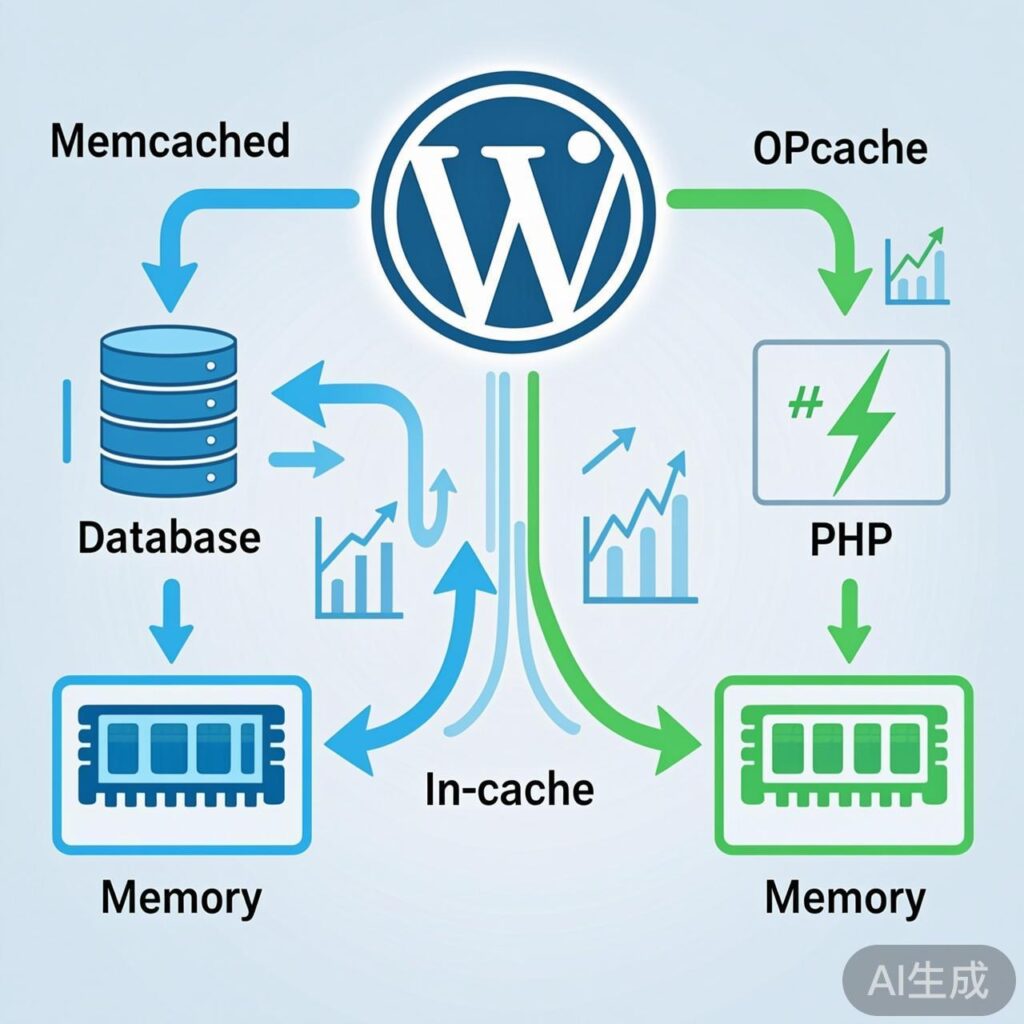
In WordPress performance optimization, different caching services play distinct roles and can work together to improve site speed.
- Memcached / Redis: Primarily used for database query results and object caching. If your site has heavy database queries and high concurrency, installing such a service is recommended to reduce database load.
- OPcache (Zend OPcache) / APCu: Primarily used for PHP code optimization and caching. They store compiled PHP bytecode in memory, avoiding recompilation on every request, which significantly improves PHP execution efficiency. Usually, you only need to enable one of them.
Therefore, WordPress can absolutely use both Memcached (for object caching) and OPcache (for PHP code caching). They operate at different layers, do not conflict, and together enhance performance.
Common Issue: Blank Page After Installing Memcached
After installing the php-memcached extension via an LNMP one-click package and uploading the object-cache.php file to the wp-content directory, the homepage may display a blank page.
Cause and Solution:
This is usually due to a mismatch between the WordPress-recommended Memcache client plugin and the installed PHP extension.
php-memcacheextension: Corresponds to the older, but widely supported "Memcache" library.php-memcachedextension: Corresponds to the more feature-rich "Memcached" library (with a 'd'), but some WordPress caching plugins may not be fully compatible.
If you encounter a blank page, try installing the php-memcache extension instead. For LNMP one-click packages, you can run:
cd /path/to/lnmp-install-directory
./addons.sh
Then select php-memcache from the menu.
Configuring Memcache Object Caching for WordPress
1. Install the necessary PHP extension: Ensure your server has php-memcache or php-memcached installed and the Memcached service is running.
2. Obtain the WordPress object cache file: You need an object-cache.php file. You can download it from:
- The official WordPress plugin directory by searching for "Memcached Redux" or "Memcached Object Cache".
- Or use a community-maintained version from GitHub, e.g.,
https://github.com/websharks/wp-memcached.
3. Deploy the file: Upload the downloaded object-cache.php file to your WordPress site's wp-content directory (not wp-content/plugins/).
Memcached Service Management and Status Checks
1. Checking Telnet and Connecting to Memcached
First, check if Telnet client is installed (for connection testing):
# CentOS/RHEL
yum install -y telnet

# Debian/Ubuntu
apt-get install -y telnet
Connect to the Memcached service using Telnet (default port 11211):
telnet 127.0.0.1 11211Upon successful connection, you'll see:
Trying 127.0.0.1...
Connected to 127.0.0.1.
Escape character is '^]'.
2. Viewing Memcached Status
Within the Telnet connection, enter the stats command to view detailed status:
statsKey metrics explained:
- cmd_get: Total number of retrieval requests.
- get_hits: Number of successful cache hits. Hit rate =
get_hits / cmd_get; a higher value indicates better caching. - get_misses: Number of cache misses.
- cmd_set: Total number of storage requests.
- limit_maxbytes: Maximum memory allocated for Memcached (in bytes).
- bytes: Currently used memory (in bytes).
- curr_items: Number of items currently stored in cache.
3. Flushing Cache and Restarting Service
- Flush all cache data (use with caution): Execute
flush_allin the Telnet session. - Stop service: Find the Memcached process ID (e.g., via
ps aux | grep memcached) and usekill [PID]. - Start/Restart service: Typically done via system service commands:
# Systemd systems
systemctl restart memcached

# SysVinit systems
service memcached restart
4. Adjusting Memcached Startup Parameters
To modify runtime parameters (like memory size), edit the startup configuration. For Systemd, edit /etc/systemd/system/memcached.service.d/override.conf or a similar file. Example parameters:
/usr/bin/memcached -d -m 128 -l 127.0.0.1 -p 11211 -c 2048 -u memcache -P /var/run/memcached/memcached.pidParameter explanation:
-m 128: Allocate a maximum of 128MB memory.-l 127.0.0.1: Listen on localhost (configure IP carefully for production security).-p 11211: Listening port.-c 2048: Maximum concurrent connections.-u memcache: Specify the run user (use a non-root user likememcache).
Important Security Note: The default configuration might listen on all interfaces (0.0.0.0), which is a security risk. Ensure access is restricted via firewall or by configuring -l 127.0.0.1.