Basic VPS Security Hardening: Change SSH Port and Disable Root Login
When setting up a VPS, changing the default SSH port and disabling direct root login are two fundamental and important security measures. This can effectively reduce automated script scanning and brute-force attacks.
Important: Before modifying the SSH port, ensure your system firewall (e.g., firewalld, iptables, or ufw) is correctly configured to allow the new SSH port and your current connection IP. Mistakes can lock you out of the server.
1. Change the Default SSH Port
The SSH configuration file is usually at /etc/ssh/sshd_config. Follow these steps:
- Open the file with a text editor (e.g., vim or nano):
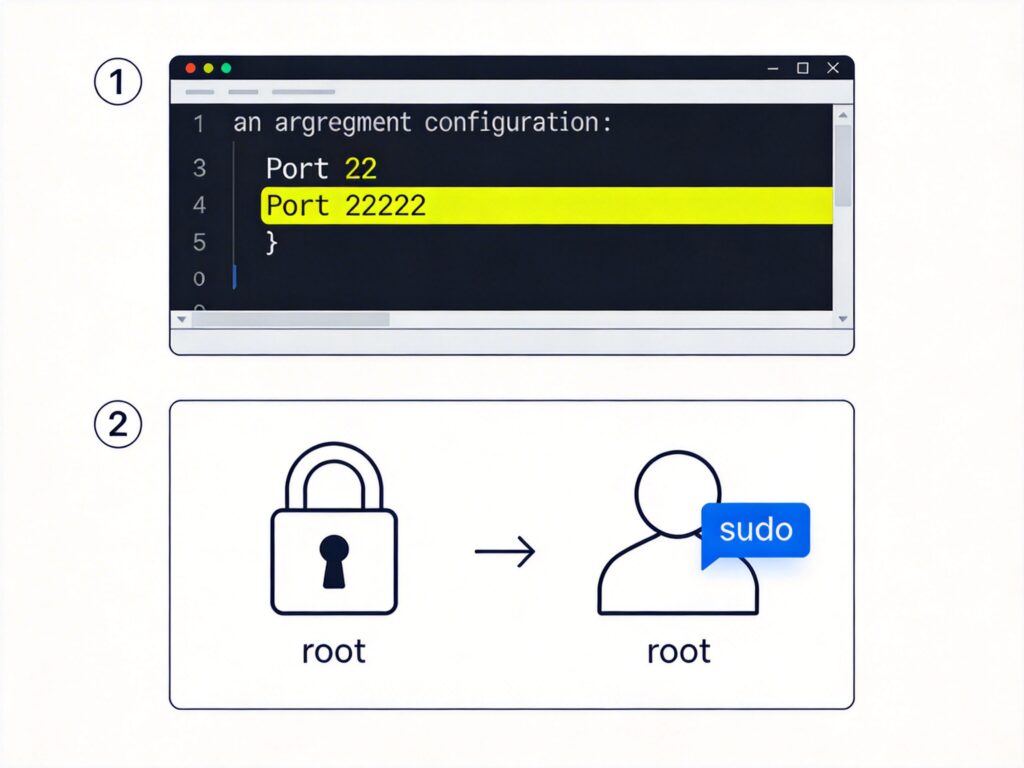
sudo vi /etc/ssh/sshd_config - Find the line containing
#Port 22(usually near the top). Remove the comment symbol#and change22to an unused port between 1024 and 65535 (e.g., 22222). The result should be:Port 22222 - Save and exit the editor (in vim, press
Esc, then type:wqand press Enter).
Alternative method (using sed): If the default Port 22 is commented, you can insert the new port after line 17 (adjust line number as needed):
sudo sed -i '17a Port 22222' /etc/ssh/sshd_config2. Restart SSH Service
After editing, restart SSH. Use the appropriate command for your Linux distribution:
- CentOS 7 / RHEL 7 / Fedora and newer:
sudo systemctl restart sshd - CentOS 6 / RHEL 6 and older:
sudo service sshd restart - Debian / Ubuntu:
sudo systemctl restart sshor
sudo service ssh restart
Test: After restarting, test the connection with the new port (e.g., ssh -p 22222 user@your_server_ip) before closing your current session.
3. Disable Root Login and Create a Regular User
Allowing direct root SSH login is a high risk. Create a regular user with sudo privileges, then disable root login.
- Create a new user (e.g., myuser):
sudo adduser myuserSet a password and optional info (skip by pressing Enter).
- Grant sudo privileges:
For Debian/Ubuntu:sudo usermod -aG sudo myuserFor CentOS/RHEL/Fedora (add to wheel group):
sudo usermod -aG wheel myuser - Disable root login: Edit
/etc/ssh/sshd_configagain. Find thePermitRootLoginline and change it to:PermitRootLogin noIf commented, remove the
#. - Restart SSH service using the appropriate command from above.
Note: After disabling root login, you cannot use SFTP clients directly as root. For root operations, log in as a regular user and use sudo, or upload files via SFTP to the user's home directory and move them.
4. Additional Security Recommendations
- Use SSH key authentication: Disable password login entirely for higher security.
- Configure Fail2ban: Install and set up Fail2ban to automatically block IPs with repeated failed login attempts.
- Keep the system updated: Regularly run
sudo apt update && sudo apt upgrade(Debian/Ubuntu) orsudo yum update(CentOS/RHEL) to install security patches.
After completing these steps, your VPS will have significantly improved basic security.